linksys wrt54g as serial wifi adapter for arduino
For one of my upcoming projects, I will need to exchange data between a server and an arduino wirelessly. I have a few NRF24L01 RF tranceivers that would work, but I’d need another arduino or raspberry pi with another NRF24L01 hooked up to my server. I’d like to avoid that. Wi-Fi would be ideal, but I don’t want to wait on an ESP8266 module from China and Wi-Fi shields are expensive. As of writing this, a Wi-Fi shield from Sparkfun is $85.
Looking thriough my closet, I found an old Linksys WRT54G Version 3.1. Well, actually, I found about five of them. There was one with a blown WAN port that would be perfect as a wireless client.
Configure the router
First off, the router will need DD-WRT installed. You can download and find install guides and documentation for your specific router version at dd-wrt.com.
I wanted to install DD-WRT first, to make sure that this router actually worked. I have no idea where it came from and there was already note taped to it warning of a few bad ports. Luckily everything seemed to work, except for the WAN port.
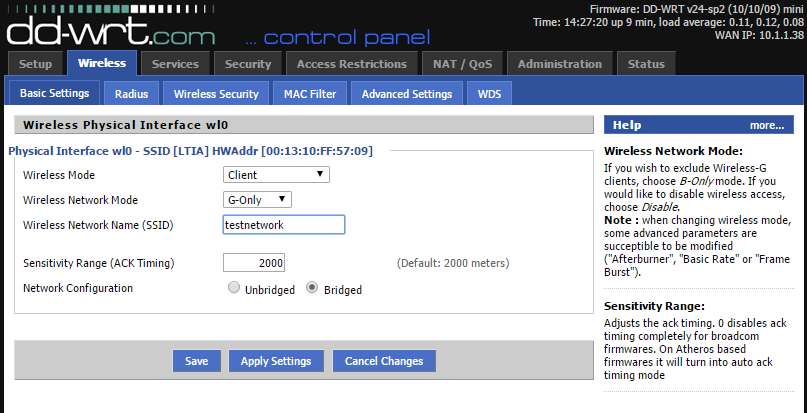
Now that we know the router is working, we can configure the router as a wireless client by logging in to the web interface and opening the Wireless tab. Under Basic Settings set the Wireless Mode to Client and enter the network’s SSID in the Wireless Network Name (SSID) field.

The SSID and security settings must be the same as the network that the client is connecting to, so since the network is secured, we must navigate to the Wireless Security tab and select the security mode and enter the shared key for the network.
We can now reboot the router and verify that it is connecting to the wireless network. If it doesn’t connect, try rebooting once more. I find that with this router, I usually have to reboot twice.
At this point, we can connect to the network directly through the WRT54G, using it as a giant Wi-Fi dongle.
Serial connection
Great, so now we have a working Wi-Fi adapter. How do we connect this to our arduino?
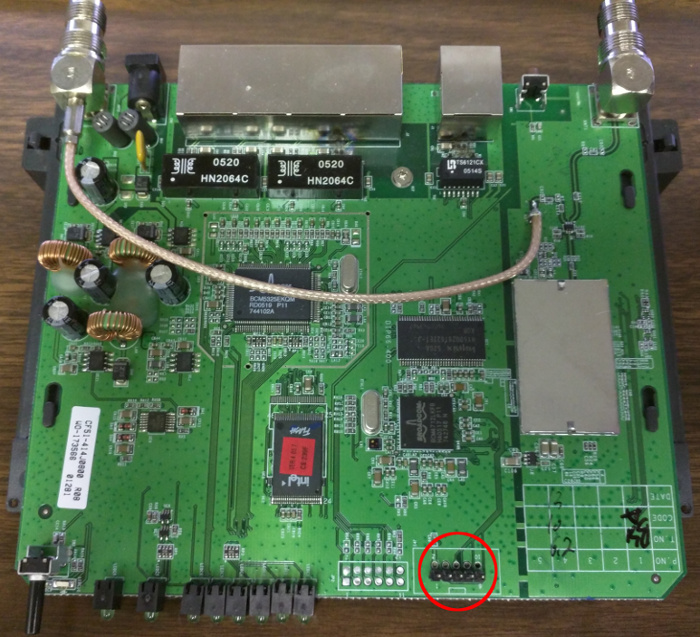
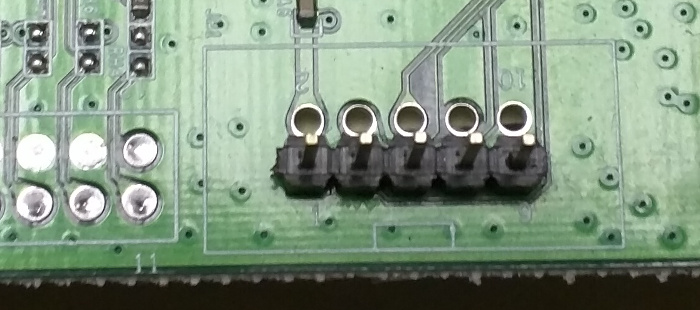
On the main board of the WRT54G, there are a group of pinholes for two serial ports.

We can solder header pins in these pinholes and communicate over the rx and tx pins.

The pinout is:
|
|
You can find more info here and here.
Router Software
Now that we have the pins soldered, we need to install some software on the router to pass the serial data to the network.
Back in the web interface of the router, go to the Services tab and enable Secure Shell. Under the Security tab, you will also need to disable the firewall.
Next, go to the Administration tab. On the first tab, Management, scroll down to the Remote Access section and enable remote ssh and web access to be able to manage the router from a different machine.
Next, scroll down to JFFS2 Support.

Enable JFFS2 and Enable Clean JFFS2 then apply the settings and reboot. After the reboot, the CLEAN JFFS option will revert back to disabled.

You should be able to ssh into the router now.
When connecting with ssh, you must use root as the username, not the username you selected for the web interface.
Once logged in, verify that the /jffs/tmp directory exists
cd /jffs/tmp
If it doesn’t, JFFS2 support was not enabled correctly. You may need to reboot once more.
Download ser2net_2.3-1_mipsel.ipk and copy it to the /jffs/tmp directory
scp ser2net_2.3-1_mipsel.ipk root@10.1.1.100:/jffs/tmp
Back on the router, navigate to the /jffs/tmp directory and run ipkg install ser2net_2.3-1_mipsel.ipk
Now we can start ser2net.
ser2net -C "5555:raw:1000:/dev/tts/1:115200 NONE 1STOPBIT 8DATABITS -XONXOFF -LOCAL -RTSCTS"
This starts ser2net on port 5555 which is using /dev/tts/1 with 115200 baud. Plug in the arduino
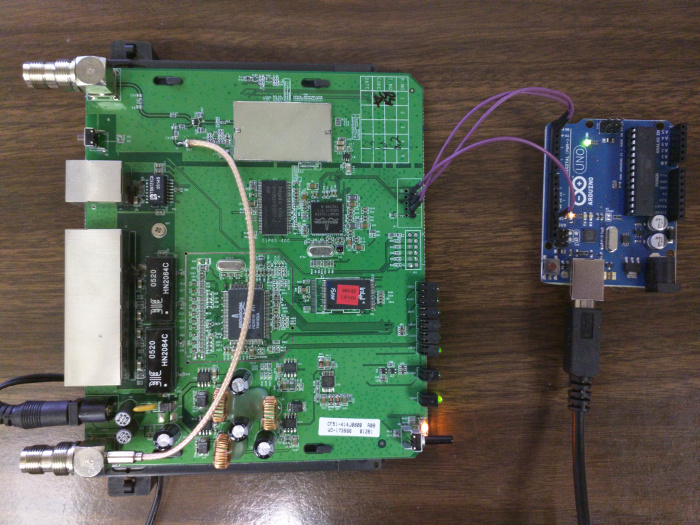
Hook up the arduino’s Rx, Tx, and GND pins to the routers Tx, Rx, and GND pins.
|
|

Upload a quick sketch to the arduino
|
|
You should now be able to telnet to your router on port 5555. You can then type a word and hit enter and the arduino should convert your word to uppercase.
Once this is working, you will need to set ser2net to start up automatically.
Back in the web interface, go to the Administration tab and then the Commands tab. In the Commands box, enter:
/jffs/usr/sbin/ser2net -C "5555:raw:1000:/dev/tts/1:115200 NONE 1STOPBIT 8DATABITS -XONXOFF -LOCAL -RTSCTS"
Click Save Startup.
Now, when you reboot, ser2net should automatically start.